
How To Upload Photos To Google Forms
If you have an online store, you know that uploading photos to Google Forms is a must-have feature. But how do you do it? CSB News 24, explains we’ll walk you through how to upload photos to Google Forms using the Google Sheets Spreadsheet. First, open Google Sheets and create a sheet called “Forms.” You will need to create a name for the sheet and choose a type of sheet on this sheet. We recommend using a sheet with photos because it makes it easy to manage your photos. In the “Forms” sheet, you will need to create a new row and name it “Photos.” You will also need to create a new column called “Photos Uploaded.” You will now
Create A New Row In The “Photos Uploaded” Column:
When you create a new Google Forms form, you’ll want to add a row to the “Photos Uploaded” column. This row will list all of the photos uploaded to your paper. You can add pictures to your form by clicking on the “Upload” button or by using the “Edit” button on the form. Once you’ve uploaded the photos, you’ll need to decide which image you want to use as the form’s background. You can choose a shot from the “Photos Uploaded” column or a photo from the “Photos Selected” column. You can also choose to add a caption to the images. This will help make the photos more exciting and engaging for your form users.
Enter The Photo You Want To Upload:
Google Forms is a great way to collect data and track important information. When you create a form, you can enter a lot of information. But sometimes, it can take time to remember all of the data. That’s where the Upload Photos to Google Forms feature comes in. With this feature, you can easily upload photos to Google Forms. You can also use this feature to track the progress of your form. Once you have uploaded the images, you can use the Edit button to change the information in the state. You can also use the Update button to keep track of the changes made to the form. You can also use the Delete button to remove the photos from the state.
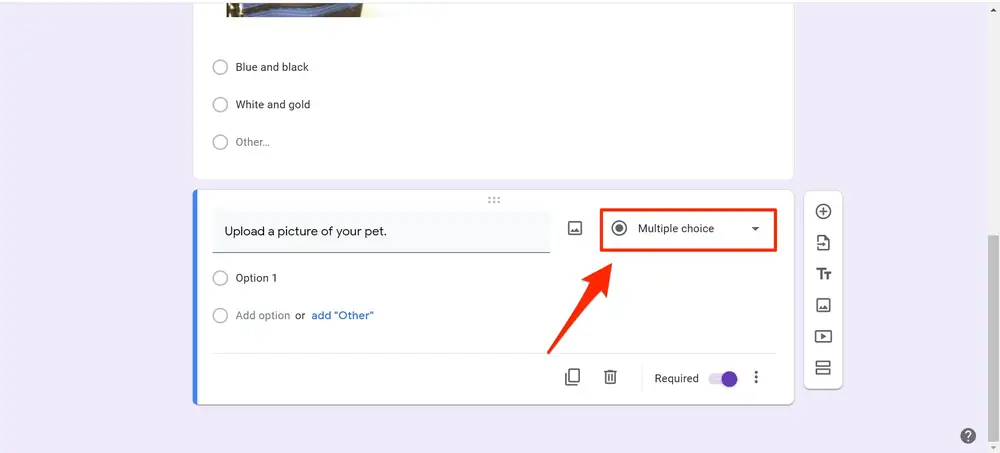
Click The “Upload” Button:
When you create a Google Forms account, you are given the option to upload photos. This is a great way to show your customers a selection of images. You can also use this feature to promote your website or to create a photo album for your customers. You can also use this feature to complete a Custom Form. You can use this Custom Form to create a survey or to ask your customers questions. You can also use this Custom Form to create a form for your web page. You can complete a Google Form and add photos to it. This will make your paper look more exciting and increase your customers’ likelihood of using it. You can add a photo of yourself, a picture of your company logo, an image of your office, a picture of your product, or anything else that will help your customers remember your business.
Wait For The Sheet To Upload The Photo:
When you create a Google form, you’ll want to ensure that the photos you upload are high quality. Digital Tips Tech advice, you can select the images you wish to upload and click the “upload photo” button. Once the photo is uploaded, you’ll need to wait for it to be processed. The process will take a bit longer than expected, but it’s worth it because the photos will be of excellent quality. Once the image is processed, you’ll be able to see it in the “photos” section of your Google form. Creating a layout for your website is a great way to build customer loyalty. The custom forms that you can start with Google Forms can be used to collect information from your customers. They can collect contact details, feedback, or anything you want to know about your customers.
In conclusion, there are many ways to do this. The easiest way is to use the File Upload option and then drag the images into the form. Another way is to use the Drag and Drop option and drag and drop the image files into the state.
