
How to Add Google Login to Your WordPress Website | Step By Step SOS Login Integration
Have you ever wondered why users abandon registration forms faster than they abandon shopping carts? The answer lies in the friction of traditional sign-up processes. In today’s fast-paced digital world, users expect seamless experiences that don’t require them to remember yet another password or fill out lengthy forms.
Google Login integration represents a powerful solution that bridges this gap between user convenience and website functionality. By implementing social login options, you’re essentially rolling out the red carpet for your visitors, making their journey from curious browsers to registered users as smooth as silk.
This comprehensive guide will walk you through everything you need to know about adding Google Login to your WordPress website. We’ll explore the technical aspects, security considerations, and best practices that will help you create a user-friendly authentication system that your visitors will actually want to use.
Why Social Login Matters for WordPress Websites
Picture this: you’re browsing a website, find something interesting, but then hit a wall – a registration form asking for your email, password, confirmation password, first name, last name, and possibly your life story. What do you do? If you’re like 86% of users, you simply leave.
Social login integration isn’t just a fancy feature; it’s a conversion optimization tool disguised as a convenience feature. When users can log in with their existing Google accounts, you’re eliminating the biggest barrier between them and your content.
Benefits of Google Login Integration
The advantages of implementing Google Login extend far beyond simple convenience. First and foremost, you’re dramatically reducing registration abandonment rates. When users can authenticate with a single click, they’re significantly more likely to complete the process.
From a business perspective, Google Login provides access to verified user data, which means higher quality leads and reduced spam registrations. Google’s robust verification system acts as your first line of defense against fake accounts and malicious users.
Additionally, you’re improving your website’s overall user experience by eliminating password-related support tickets. No more “forgot password” emails or frustrated users locked out of their accounts because they can’t remember their credentials.
User Experience Enhancement
Think of Google Login as the express lane at the grocery store. While traditional registration is like pushing a full cart through the regular checkout, social login is grabbing a single item and breezzing through the express lane.
This enhanced experience translates directly into improved user satisfaction and retention rates. Users who can easily access your website are more likely to return, engage with your content, and eventually convert into customers or loyal subscribers.
Prerequisites for Adding Google Login
Before diving into the implementation process, you’ll need to ensure you have the necessary access and accounts in place. Think of this as gathering your tools before starting a home improvement project – proper preparation prevents poor performance.
WordPress Admin Access Requirements
You’ll need administrative access to your WordPress website, which means having an account with administrator privileges. This access is essential because you’ll be installing plugins, modifying settings, and potentially editing theme files.
Additionally, ensure your WordPress installation is up to date. Outdated WordPress versions may have compatibility issues with modern social login plugins, and keeping your site updated is crucial for security reasons.
Google Developer Account Setup
Creating a Google Developer account is your gateway to accessing Google’s API services. The good news? If you already have a Gmail account, you’re halfway there. Simply navigate to the Google Cloud Console and sign in with your existing Google credentials.
The process is straightforward and free for basic usage. Google provides generous free tiers for most of their API services, which means you likely won’t incur any charges unless you’re running a high-traffic website with thousands of daily logins.
Setting Up Google OAuth Credentials
This section is where the rubber meets the road. Setting up OAuth credentials might sound intimidating, but it’s actually quite manageable when broken down into digestible steps.
Creating a Google Cloud Project
Start by navigating to the Google Cloud Console and creating a new project. Think of this project as a container for all your website’s Google integrations. Give it a descriptive name that you’ll recognize later – something like “MyWebsite-SocialLogin” works perfectly.
Once your project is created, you’ll need to enable the Google+ API or Google Identity services, depending on which authentication method you prefer. The Google Cloud Console interface is intuitive, with clear navigation and helpful tooltips guiding you through each step.
Configuring OAuth Consent Screen
The OAuth consent screen is what users see when they’re asked to grant permission for your website to access their Google account information. This screen is crucial for building trust and ensuring compliance with Google’s policies.
You’ll need to provide basic information about your application, including your website’s name, logo, and privacy policy URL. Be honest and transparent in your descriptions – users appreciate clarity about what data you’re accessing and why.
Generating Client ID and Client Secret
Your Client ID and Client Secret are like the keys to your digital kingdom. The Client ID identifies your application to Google’s servers, while the Client Secret authenticates that the requests are actually coming from your website.
Store these credentials securely and never share them publicly. Many developers make the mistake of accidentally committing these credentials to public repositories, which can lead to security vulnerabilities and unauthorized access.
Popular WordPress Plugins for Google Login
Choosing the right plugin is like selecting the right tool for a job – the wrong choice can make a simple task unnecessarily complicated. Let’s explore some of the most reliable and feature-rich options available.
Step 1: Install a Google Login Plugin
The easiest and safest way to add Google Login is by using a trusted WordPress plugin.
Recommended plugins:
-
Nextend Social Login
-
WP Social Login
-
Super Socializer
We will use Nextend Social Login in this guide.
Steps:
-
Go to WordPress Dashboard → Plugins → Add New
-
Search for “Nextend Social Login”
-
Click Install Now
-
Click Activate

Step 2: Enable Google Provider in Plugin Settings
-
Go to Settings → Nextend Social Login
-
Click on Google
-
Toggle Enable to ON
-
Keep this page open (you’ll need it later)
Step 3: Create Google OAuth Credentials (Google Cloud Console)
Now you must connect your website with Google.
-
Visit Google Cloud Console
-
Click Create Project
-
Enter a project name (e.g., WordPress Google Login)
-
Click Create


Step 4: Configure OAuth Consent Screen
-
Go to APIs & Services → OAuth Consent Screen
-
Select External
-
Click Create
-
Fill required details:
-
App name
-
User support email
-
Developer contact email
-
-
Save and continue (no need to add scopes)


Step 5: Create OAuth Client ID
-
Go to APIs & Services → Credentials
-
Click Create Credentials → OAuth Client ID
-
Select Web Application
-
Add:
-
Authorized JavaScript Origins
-
https://yourwebsite.com
-
-
Authorized Redirect URI
-
Copy this from the Nextend plugin settings
-
-
-
Click Create
Google will generate:
-
Client ID
-
Client Secret


Step 6: Connect Google Credentials to WordPress
-
Go back to WordPress → Nextend Social Login → Google
-
Paste:
-
Client ID
-
Client Secret
-
-
Click Save Changes
-
Click Verify Settings
You should see a green success message.


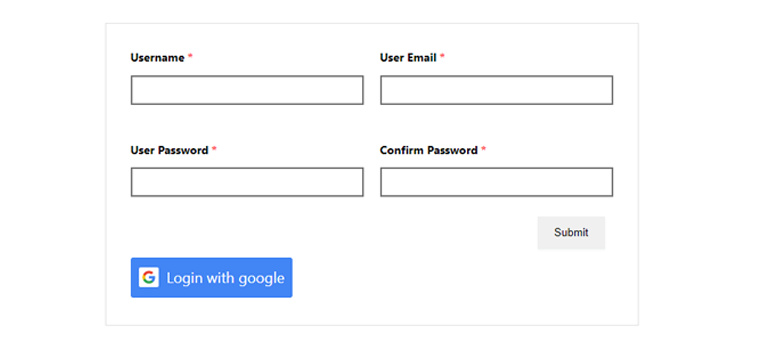
Step 7: Enable Google Login Button on Login & Registration Pages
-
In Google provider settings:
-
Enable Login Form
-
Enable Registration Form
-
Enable WooCommerce / Custom Forms (if applicable)
-
-
Save settings

Step 8: Test Google Login
-
Open WordPress login page
-
Click “Login with Google”
-
Select your Google account
-
You should be logged in successfully
New users will be auto-registered in WordPress.


Optional Enhancements
-
Redirect users after login (Dashboard / My Account page)
-
Limit login to specific Google domains
-
Customize button text and style
-
Enable account linking for existing users
Benefits of Google Login on WordPress
-
Faster user registration
-
Reduced password fatigue
-
Higher conversion rate
-
Improved user experience
-
Secure OAuth authentication
Final Notes
This method works perfectly for:
-
Blogs
-
WooCommerce stores
-
Membership websites
-
Custom WordPress portals
If you want:
-
WooCommerce-specific setup
-
Custom design button
-
Manual (code-based) Google OAuth
-
Social login for checkout page
Customization Options and Advanced Settings
Once your basic Google Login functionality is working, you can focus on customization and optimization. This is where you can really make the feature feel like a natural part of your website rather than an obvious third-party addition.
Button Design and Placement
The design and placement of your Google Login button can significantly impact its usage rates. Consider placing the button prominently on your registration and login pages, but don’t make it so dominant that it overshadows other important elements.
Most plugins offer various button styles, from official Google-branded buttons to custom designs that match your website’s aesthetic. Remember that users are familiar with Google’s standard login button design, so completely custom designs might reduce recognition and trust.
User Role Assignment
Decide what user role new Google Login users should receive by default. Most websites assign the “Subscriber” role initially, but your specific needs might require different defaults.
Consider implementing a system that assigns different roles based on the user’s Google account domain. For example, users with email addresses from your organization might automatically receive higher privileges.
Data Mapping Configuration
Configure how data from Google accounts maps to your WordPress user profiles. Typically, you’ll want to capture the user’s name, email address, and profile picture, but some plugins allow you to access additional information like location or language preferences.
Be mindful of privacy regulations and only collect data that you actually need and have permission to use. Transparency about data collection builds trust and ensures compliance with privacy laws.
Security Considerations and Best Practices
Security isn’t just an afterthought – it should be woven into every aspect of your Google Login implementation. Think of security measures as the foundation of a house; you might not see them, but everything else depends on their strength.
SSL Certificate Requirements
Google requires HTTPS for OAuth authentication, which means your website must have a valid SSL certificate. This requirement isn’t just a Google policy – it’s a fundamental security best practice that protects your users’ data during transmission.
If you haven’t already implemented SSL, now is the perfect time. Many hosting providers offer free SSL certificates through Let’s Encrypt, making this security upgrade both easy and affordable.
Privacy Policy Compliance
Your privacy policy must clearly explain how you use data obtained through Google Login. This isn’t just good practice – it’s often a legal requirement, especially if you have users in the European Union or California.
Be specific about what data you collect, how you use it, how long you retain it, and what rights users have regarding their data. Transparency builds trust and protects you from potential legal issues.
Troubleshooting Common Issues
Even with perfect preparation, you might encounter issues during implementation or ongoing operation. The key is knowing how to diagnose and resolve common problems quickly.
Authentication Errors
Authentication errors often stem from mismatched configurations between your WordPress plugin and Google Cloud Console settings. Double-check that your Client ID and Client Secret are correctly entered and that your OAuth consent screen is properly configured.
Time synchronization can also cause authentication issues. Ensure your web server’s time is accurately synchronized, as OAuth tokens are time-sensitive and even small discrepancies can cause failures.
Redirect URI Problems
Redirect URI mismatches are among the most common configuration issues. The URI in your Google Cloud Console must exactly match the one your WordPress plugin is using, including the protocol (HTTP vs. HTTPS) and any trailing slashes.
If you’re still experiencing issues, try regenerating your credentials and updating them in your WordPress plugin. Sometimes a fresh set of credentials resolves persistent problems.
Implementing Google Login on your WordPress website is more than just adding a convenient feature – it’s about creating a frictionless user experience that encourages engagement and builds lasting relationships with your audience. By following the comprehensive steps outlined in this guide, you’re well-equipped to successfully integrate social login functionality that your users will appreciate and actually use.
Frequently Asked Questions
1. Do I need a premium plugin to add Google Login to my WordPress site?
No, many free plugins offer robust Google Login functionality. However, premium plugins often provide additional features like advanced customization options, detailed analytics, and priority support that might be valuable for business websites.
2. Will Google Login work with any WordPress theme?
Yes, Google Login functionality is theme-independent since it operates at the WordPress core level. However, you may need to adjust button styling or placement to match your theme’s design aesthetic.
3. Can users still create regular WordPress accounts after implementing Google Login?
Absolutely! Google Login is an additional option, not a replacement for traditional registration. Users can choose whichever method they prefer, giving them maximum flexibility.
4. Is there a limit to how many users can log in with Google?
Google’s free tier allows for substantial usage that covers most small to medium websites. You’ll only encounter limits on very high-traffic sites, and even then, the costs are typically minimal.
5. What happens if a user’s Google account gets deleted or suspended?
The user’s WordPress account remains intact, but they won’t be able to log in using Google Login. You should always provide alternative login methods or account recovery options to handle such situations gracefully.

